How to Pour a Tulip Pattern on a Latte
Are you ready to create stunning latte art? In this article, we will guide you through the process of pouring a beautiful tulip pattern onto your latte. Latte art is a popular and impressive skill that can elevate your coffee-making abilities. Along with the tulip pattern, we will also discuss the other two popular patterns – the heart and the rosetta. With step-by-step instructions and helpful tips from Jimmy, you’ll be able to practice and pour your own tulip masterpiece. Make sure to stay tuned to our YouTube channel for more latte art tutorials and techniques. Get ready to impress your friends and enjoy the artistry of your latte creations!

This image is property of images.unsplash.com.
Choosing the Right Coffee Beans
When it comes to brewing the perfect cup of coffee, choosing the right beans is essential. The flavor, aroma, and overall taste of your coffee will greatly depend on the quality of the beans you use. There are many factors to consider when selecting coffee beans, such as the origin, roast level, and flavor profile.
Origin and Roast Level
The origin of the coffee beans plays a crucial role in determining the flavor profile. Different regions produce beans with distinct characteristics and flavor notes. For example, beans from South America tend to have a balanced flavor with notes of chocolate and nuts, while beans from Africa often exhibit fruity and floral notes. It’s a good idea to experiment with beans from different origins to find the flavor profile that suits your preferences best.
Another important factor to consider is the roast level. Lighter roasts retain more of the bean’s natural flavor and acidity, with subtle floral and fruity notes. On the other hand, darker roasts have a bold and robust flavor, with smoky and caramelized undertones. It’s worth trying out different roast levels to discover the taste that appeals to you the most.
Flavor Profile
Coffee beans offer a wide range of flavor profiles, from bright and citrusy to rich and chocolatey. Pay attention to the tasting notes provided by coffee roasters, as they can give you insight into the flavors you can expect from the beans. Some common flavor notes include caramel, berry, citrus, chocolate, and even floral hints. Identifying the flavors you enjoy can help guide your coffee bean selection process.
To ensure the freshness and quality of your coffee beans, opt for whole beans rather than pre-ground. Whole beans have a longer shelf life and retain their flavors better when freshly ground just before brewing.
Preparing Your Equipment
To make the perfect cup of coffee, preparing your equipment is just as important as choosing the right beans. Here are a few steps to follow to ensure your equipment is in top shape:
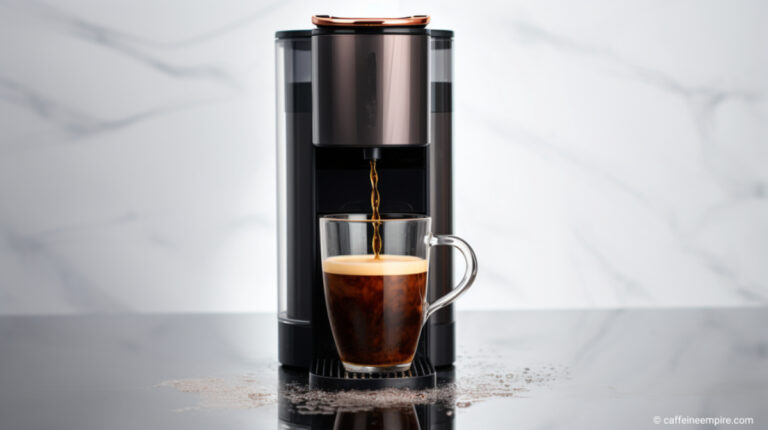
Clean Your Coffee Maker
Start by giving your coffee maker a thorough cleaning. Over time, mineral deposits and coffee residue can build up in your machine, affecting the taste and quality of your brew. Refer to the manufacturer’s instructions for proper cleaning and descaling procedures. Regularly cleaning your coffee maker will keep it functioning optimally and ensure your coffee tastes its best.
Calibrate Your Grinder
If you’re using a coffee grinder, it’s crucial to calibrate it properly to achieve the desired grind consistency. Different brewing methods, such as espresso or pour-over, require different grind sizes. Experiment with different settings on your grinder until you achieve the ideal grind size for your preferred brewing method.
Use Filtered Water
The quality of water you use can greatly impact the taste of your coffee. Using filtered water ensures that any impurities or strong minerals in tap water won’t interfere with the flavor of your brew. Additionally, water that is too hot can result in over-extraction, leading to a bitter taste. Aim for a water temperature between 195°F and 205°F for optimal extraction and taste.
Splitting the Shot
For those who enjoy espresso-based drinks, splitting the shot is a crucial step in achieving a balanced and flavorful drink. Splitting the shot involves extracting a portion of espresso to be used as the base for your drink, and reserving another portion for the milk portion.
Timing Your Shot
Timing your shot is important to ensure the extraction process goes smoothly. Generally, a shot of espresso should be extracted within 25-30 seconds. This timeframe allows for the proper extraction of flavor compounds without over-extracting and resulting in bitterness. Use a timer or a built-in timer on your espresso machine to monitor the shot extraction time.
Adjusting the Coffee-to-Water Ratio
Experimenting with the coffee-to-water ratio can help you achieve the desired strength and flavor in your espresso shot. Traditionally, a ratio of 1:2 (coffee to water) is used, producing a balanced and flavorful shot. However, feel free to adjust the ratio according to your taste preferences. Just remember to keep the extraction time and grind size in mind, as they can also affect the taste of your shot.
Selecting the Right Cup
The choice of the cup you use to serve your coffee may seem insignificant, but it can actually influence the drinking experience. Here are a few factors to consider when selecting the right cup for your brew:
Size and Shape
The size and shape of the cup can affect the way the flavors and aromas of your coffee are perceived. Smaller cups tend to concentrate the aromas, allowing you to fully experience the nuances in the coffee’s flavor profile. On the other hand, larger cups can be great for drinks with added milk or for enjoying your coffee at a more leisurely pace.
Materials
Cups come in a variety of materials, such as ceramic, glass, or stainless steel. Ceramic cups are popular due to their ability to retain heat and their aesthetic appeal. Glass cups allow you to visually appreciate the coffee’s color and texture, while stainless steel cups offer durability and heat insulation. Consider your personal preferences and the temperature retention properties of each material when choosing your cup.
Handle or No Handle
Some coffee drinkers prefer cups with handles, as they offer a secure and comfortable grip. Others enjoy the sensory experience of holding a cup without a handle, feeling the warmth of the coffee in their hands. Choose a cup style that suits your preferences and enhances your overall coffee-drinking experience.

This image is property of images.unsplash.com.
Texturing the Milk
For those who enjoy milk-based coffee drinks like lattes or cappuccinos, properly texturing the milk is essential to achieving the right balance of creaminess and frothiness.
Temperature and Freshness
Start by using cold, fresh milk to achieve the best results. The cold milk will allow for better control over the temperature during the texturing process. It’s important to avoid overheating the milk, as it can scorch and create off-flavors. Aim for a final milk temperature between 150°F and 155°F for optimal taste and texture.
Steam Wand Technique
Mastering the technique of steaming milk with a steam wand takes practice but is well worth the effort. Begin by purging the steam wand to remove any condensation and ensure a consistent flow of steam. Position the steam wand just below the surface of the milk and angle it slightly to create a whirlpool effect. This will evenly distribute heat and create a velvety texture. Experiment with different positioning and steam pressure to achieve the desired level of frothiness.
Blending the Coffee and Milk
Now that you have a perfectly split shot of espresso and textured milk, it’s time to combine the two to create your favorite espresso-based drink.
Espresso-to-Milk Ratio
The ratio of espresso to milk will depend on the particular drink you’re making. For a latte, a 1:3 ratio of espresso to milk is commonly used. This creates a well-balanced drink that retains the richness of the espresso while complementing it with creamy milk. For a cappuccino, a 1:1 ratio is typically used, resulting in a stronger coffee flavor and more prominent foam.
Pouring Technique
When pouring the milk into the espresso, it’s important to do so in a slow and steady stream. This allows the milk and espresso to blend together harmoniously, creating a visually appealing layered effect. Tilt the cup slightly and pour onto the back of a spoon to further control the flow and prevent any sudden mixing. Practice your pouring technique to achieve beautiful latte art or simply a well-mixed beverage.

This image is property of images.unsplash.com.
Creating the Base Blob
To build latte art and create intricate designs on top of your drink, it’s best to start with a base blob of milk foam. This blob serves as a foundation for the design and allows for more precise and controlled pouring.
Properly Textured Milk
Before creating the base blob, ensure that your milk is properly textured. The texture should be velvety, with small, fine bubbles evenly distributed throughout the milk. This will ensure a smooth and creamy base for your latte art.
Positioning and Pouring
Start by positioning the spout of your milk pitcher just above the espresso, allowing the milk to flow gently into the center of the cup. Gradually raise the pitcher as the cup fills with milk, forming a blob that covers the entire surface of the coffee. The size of the blob will depend on the size of your drink, with larger blobs for lattes and smaller ones for cappuccinos.
Stacking the Blobs
Once you have created the base blob, it’s time to add more layers to your latte art design. Stacking blobs of milk foam allows you to create depth and dimension in your final artwork.
Pouring at Different Heights
To stack the blobs, you’ll need to pour from a greater height than when creating the base. This will help the milk foam penetrate the previous layer and create a distinct separation between each blob. Aim for a height of 2-3 inches above the cup for optimal results.
Controlling the Pour
Controlled pouring is key to achieving well-defined layers. Pour the milk from the center of the cup, allowing the foam to spread outward and stack upon the existing blobs. Using a circular motion can help create a smooth and uniform shape. Experiment with different pouring techniques to create your desired design, whether it’s a heart, rosetta, or simply a cascade of foam.
Lifting and Pulling Through
To further enhance your latte art and give it a final touch, the technique of lifting and pulling through is employed. This technique adds intricate details and textures to your design, elevating it from a simple pattern to a true work of art.
Tool Selection
To lift and pull through the milk foam, you’ll need a tool that can create fine lines and patterns. A toothpick, a latte art pen, or a small skewer can all work well for this purpose. Choose a tool that feels comfortable in your hand and allows for precise movements.
Creating Lines and Patterns
Once you have the tool in hand, gently drag it through the stack of milk foam, creating intricate lines or patterns. You can experiment with different techniques, such as zigzagging, swirling, or feathering, to achieve various effects. Take your time and let your creativity guide your movements. The more you practice, the more detailed and impressive your latte art designs will become.
Sharing Your Progress
Once you have mastered the art of brewing coffee and creating beautiful latte art, it’s time to share your progress and delight others with your creations. Whether you’re a home barista or a coffee shop employee, sharing your passion for coffee and latte art can bring joy to those around you.
Social Media
Capture photos or videos of your latte art and share them on social media platforms like Instagram or TikTok. This allows you to connect with other coffee enthusiasts and inspire others with your skills. Use popular coffee-related hashtags to reach a wider audience and engage with the coffee community.
Coffee Art Events
Consider participating in coffee art events or competitions in your local area. These events provide opportunities to showcase your skills, learn from other talented baristas, and receive valuable feedback. Not only will you be able to share your progress with others, but you’ll also have the chance to be inspired by fellow coffee lovers.
Coffee Tastings and Workshops
Organize coffee tastings or workshops where you can share your knowledge and skills with others. This can be done at home with friends and family or even at a local coffee shop or community center. Teaching others how to brew coffee and create latte art fosters a sense of community and allows you to be a part of someone else’s coffee journey.
In conclusion, choosing the right coffee beans and properly preparing your equipment are the foundation for creating a delicious cup of coffee. Splitting the shot and selecting the right cup set the stage for an enjoyable coffee-drinking experience. Texturing the milk, blending the coffee and milk, and creating the base blob all contribute to the art of latte making. Stacking the blobs, lifting and pulling through, and sharing your progress with others allows you to showcase your skills and inspire fellow coffee lovers. So brew up a cup of your favorite coffee, get creative with your latte art, and enjoy the rich and flavorful world of specialty coffee. Cheers!